Painting with Wilson Bickford
Wilson Bickford “Feathered Friend” Part 2
Season 7 Episode 13 | 27m 13sVideo has Closed Captions
In part two, Wilson details the bird and the water pump.
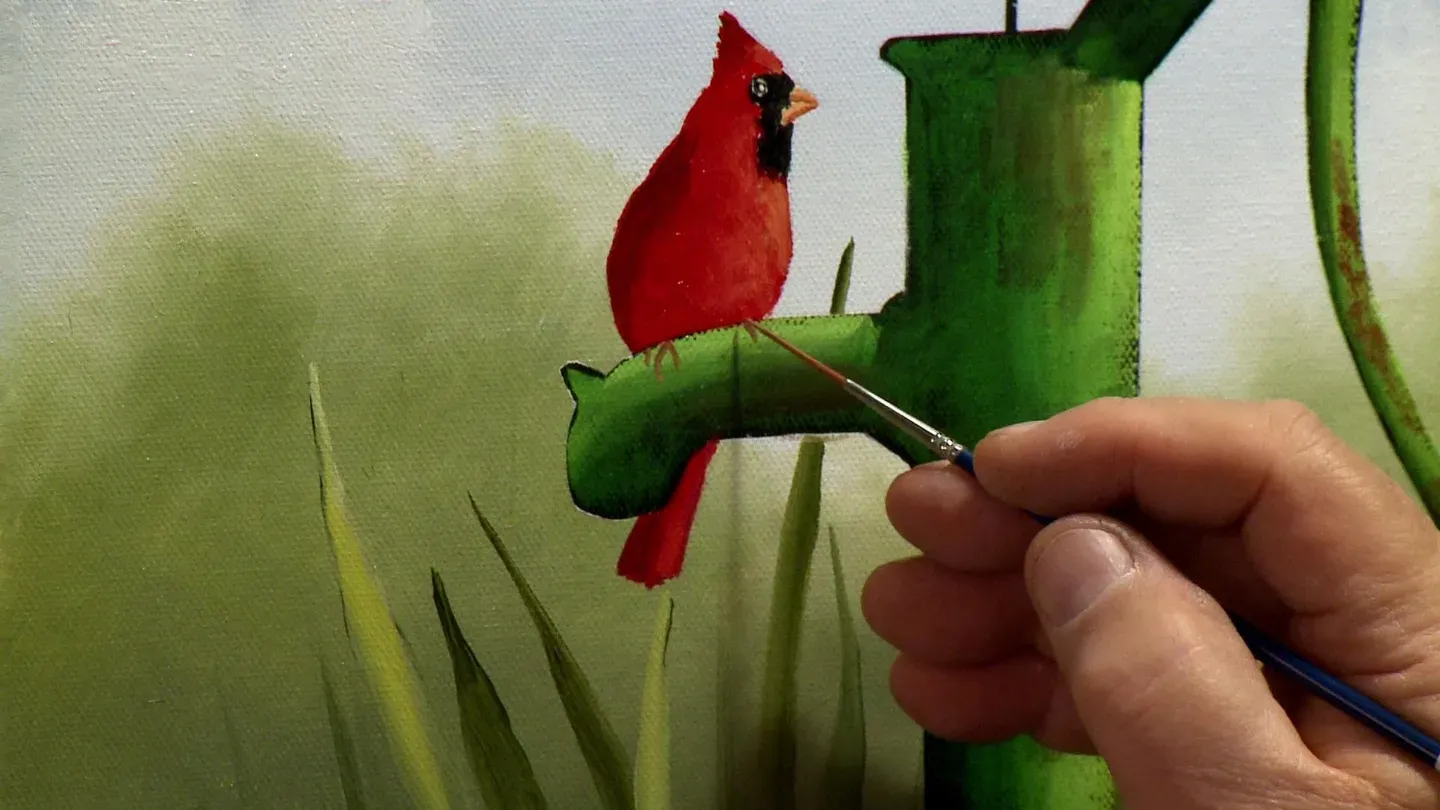
A bright red cardinal is perched on a rustic, antique water pump, enjoying the beautiful summer day. In part two, Wilson details the bird and the water pump.
Problems with Closed Captions? Closed Captioning Feedback
Problems with Closed Captions? Closed Captioning Feedback
Painting with Wilson Bickford is a local public television program presented by WPBS
Sponsored by: St. Lawrence County &nbps; &nbps; The Daylight Company &nbps; &nbps; J.M. McDonald Foundation
Painting with Wilson Bickford
Wilson Bickford “Feathered Friend” Part 2
Season 7 Episode 13 | 27m 13sVideo has Closed Captions
A bright red cardinal is perched on a rustic, antique water pump, enjoying the beautiful summer day. In part two, Wilson details the bird and the water pump.
Problems with Closed Captions? Closed Captioning Feedback
How to Watch Painting with Wilson Bickford
Painting with Wilson Bickford is available to stream on pbs.org and the free PBS App, available on iPhone, Apple TV, Android TV, Android smartphones, Amazon Fire TV, Amazon Fire Tablet, Roku, Samsung Smart TV, and Vizio.
Providing Support for PBS.org
Learn Moreabout PBS online sponsorship- In part one, we rendered the background and started the old pump.
Now, it's time to pick up where we left off, and welcome our feathered friend.
Join me next on "Painting with Wilson Bickford."
- [Announcer] Support for "Painting with Wilson Bickford" is provided by the J. M. McDonald Foundation, continuing the example modeled by J. M. McDonald by contributing to education, health, humanities, and human services.
Sharing since 1952.
Online at jmmcdonaldfoundation.org.
(soft electronic music) In rural New York State, bordered by the St. Lawrence River and the Adirondack Mountains, is a sprawling landscape with communities that offer self-guided tours for the creatively inclined.
Learn the stories behind the barn quilt traditions, family, agriculture, nature, and beauty.
St. Lawrence County, life undiscovered.
- Hi, welcome back.
I'm glad you could tune in today.
We're gonna finish up "Feathered Friend."
As you recall, in episode one we prepped the background with the pump and the bird, we dropped the clouds and the background trees in, removed the tape.
I have clear glazing medium on the pump so we can develop that and get the nice blending on there, so we just need to develop the bird and the pump to bring this thing to a completion.
You willing to go?
Let's do it.
I'm gonna start out with my detailed scriptliner, and I'm gonna start developing the bird's beak.
There's a lot going on with that little beak, believe it or not.
I still have some white base coat left here, from before, when we did the background.
I'm gonna take white base coat with a little bit of yellow, a little touch of burnt sienna.
I want kind of a yellowy, almost flesh color.
I can put just a touch of red in that too.
There we go, something about like that.
I don't even know what to call that color.
It's kind of a dull orange.
I'm gonna use my little steady stick here so I can get in here and lean my hand.
I'm gonna paint pretty much the whole beak with this color.
Then we've got some shading that we need to put on there.
This takes a steady hand.
Kinda like that.
I left a little sliver, if you can see there, is a little sliver of where that division was.
That'll be filled in.
I'm also gonna take a little bit of burnt sienna, I'm gonna swish that brush out, then dry it off, and I'll take a little bit of burnt sienna, and I'm gonna do the underside of his beak.
I guess I'd better still use my stick here to steady.
This is a touchy spot.
We'll put a little underneath there, and right where that division is, I'm gonna put a little bit right there.
So, see, now, there's two different colors on that.
I know it's probably hard to see.
It's a small area, but there's light and dark on that beak to give it the shape.
So I'm doing the undersides of each half, top and bottom of the beak, if that makes sense.
Shall we give it some nice shape?
And that's probably the touchiest area we have to do all day right there.
If you can get that done, you got it made.
I've swished the brush out again.
I'm gonna take black.
And maybe, for this, I'm gonna scale down and use my liner.
This is the number two liner, not the detailed scriptliner.
Notice how much bigger this brush is.
I'm gonna dip into the thinner, I'm gonna take black, and roll this to a point.
I thinned the paint down kinda like milk consistency so it's quite thin.
I'm simply gonna paint his little eyeball.
Like that.
From there, I'm gonna paint that black mask that he has, but I'm gonna try to leave a little sliver of white around his eye, just enough to differentiate the eye from the rest of the mass of feathers, leave a very, very small little space, not much.
You notice, when I'm talking, that my voice gets like this, it's because I'm holding my breath to stay steady.
And when I don't talk at all, that's when I'm really trying to be steady.
Whew.
Gotta take a breath.
This is touchy stuff, but you can do it, I got faith in ya.
Okay, I'm going around the beak.
There we go.
He's got his mask on.
Looks like a bandit.
The bandito cardinal.
All right, just that easy.
Okay, that wasn't too bad, was it?
No, that wasn't too bad.
I'm gonna come back eventually, but a little dot of white in his eye, give him a spark of life.
For right now, I'm gonna lay that brush to the side, and I'm gonna go back to my bigger brush, that detailed scriptliner, and I've swished the black out of it.
I had black on there.
I'm gonna use straight red.
This is cadmium red deep.
I'm gonna take that, and I'm gonna thin it down with a couple drops of paint thinner.
You can use this clear glazing medium too, same purpose, just to thin it down.
I'm gonna paint the whole red body part red, everything, the wing, the belly, the tail, all of it.
I'm gonna try to get these little scallops on his crest on the back of his head.
Now, into this, I'm gonna put highlight and shadow, so this'll actually end up being a midtone.
You've probably heard it before that you need a minimum of three tones, shadow, middle, and light, to show form on an object.
This'll end up being the midtone 'cause I'm gonna add darks and lights with it.
Paint feels a little dry, so I'm gonna add a couple more drops of thinner.
The thing is, the minute you put thinner on your palette, it starts to evaporate, so you have to keep rejuvenating it, and adding thinner to it.
Gonna bring this right down to the pump.
Gotta skip down here and do his tail here eventually too.
We don't wanna forget that.
All right.
You know, I see a lot of these old pumps in my travels, like I said before, and still a lot of them out around, and for whatever reason, I don't know if there's a reason for it, probably not anything specific, but most of 'em were either green or red.
Sometimes, you'll see a black one, but it seems most of them were always green or red, and I don't know why.
I don't know if there's any specific reason for that, but if you know of something, send me a message and let me know.
I'd be interested to hear it.
Maybe that's just all the paint they had handy at the time, I don't know, but.
Okay, I'm gonna bring this down.
We're getting there for the cardinal.
There isn't a whole lotta detail we gotta do on him.
Gonna put some shading and highlight, and he'll be done.
He's just far enough away where we don't have to show every little spick and speck on him.
Just takes a little bit of time and a steady hand.
I'm going outside my line there just a little bit 'cause I'm trying to hurry, so you take your time when you do yours.
He's just got a little bit wider tail, that's all right.
He just needs to go to the gym more, like me.
I'd go to the gym more if I wasn't so busy painting all the time.
You gotta pick your battles, you know?
Okay.
There we go, that's looking pretty good.
I'm gonna take some burnt sienna into that red that I just used.
This is the rusty color.
This will darken it down, but it'll still be on the reddish side of things, and by adding all that burnt sienna dry paint in there, it's thickening my mixture up, so I know it feels a little sticky, so I'm gonna dip a little more thinner on there.
Keep your paint workable.
If the paint doesn't come off your brush, and you're having to scrub and fight with it, you're making it harder than it needs to be.
Notice, on this side of his body, where his wing wraps around, just a little darker?
I'm gonna go just a hair darker than that.
You can also put just a speck of black with it, if it needs it.
I want it a little darker on this side so his body will start looking a little rounded.
He's a well-rounded bird.
He went to college and everything.
I got a little bit on the back side, left hand side of his tail, down in here.
All right, he's coming.
I don't have it in this particular one too much, but I'm gonna put a little bit of dark right on the back of his head right here, on that pointed crest part, just give him a little more shape.
I'm also gonna take some white, cadmium yellow pale, and just a little bit of red, and try to get a lighter orange color.
Red is a tough color to work with, because, if I simply add white to the red to highlight, it's gonna turn pink, which is a separate color in its own right, so, we don't want a pink cardinal, we wanna keep him red.
So, pretty much, the generally-accepted rule for highlighting red is to use an orange, so what I've done is mixed yellow with white and red, and the yellow and red give me an orange.
So, see, it's a little bit lighter, just enough to look like a highlight, but not turn pink.
So, always remember, if you highlight red, use orange.
See, I'm kinda patting it on so it leaves a little bit of a texture, he looks a little fuzzy and feathery.
I'm not smoothing it out so much.
I'm literally just patting it on there.
It leaves him a little textured, that's a good thing.
I'm also gonna put a little bit right here on his forehead.
And, where it transitions around his body, I'm gonna wipe this off, and fuzz it out, and just kinda make sure it gradually changes from light to dark so he looks round.
I can probably put just a little speck on his tail down here wouldn't hurt anything either.
All right, and remember, I said I was gonna come back, put a dot in his eye.
I have black on this liner.
This is the number two liner, the skinnier brush.
I've gone back to it.
I'm gonna take a little bit of this white base coat, and roll it to a little point, get a little gob right on the point of the brush, and in his eye, I'm gonna try to put just the smallest little dot, and he's got a spark of life.
There we go.
Now, we gotta start in on the pump.
This pump's gonna take a few minutes.
As simple as it looks, a lot of ground to cover.
This is emerald green, and I'm gonna put just a touch of white with it, just enough to say so.
Now, see, this is a manmade paint, so you can afford to go quite bright with it like that.
That's pretty bright.
Foliage, colors, those greens, that's why I use sap green.
It's more of a natural color.
Anything that's manmade, like spray paint, or paint in a can, any kinda paint, it can be any color.
I am gonna mute this back a little bit with some sap green and kinda split the difference.
There we go, it's not quite so turquoise-y green, but I want some of this emerald green in with that.
And if you look at this closely, you'll notice I left some dark even showing through it.
I kinda dry brushed it.
I wasn't trying to cover every little spick and speck of it.
I don't want it to look like they came out and painted it yesterday.
I want it to look worn.
So, see, if I use the paint rather dry, you'll see some of that black showing right through it, which is the whole point of painting it black to begin with.
I wanna utilize that.
So, see, this is kinda tedious.
You're gonna wanna take your time on this step.
I'm being careful of my edges right there.
Don't wanna go over the edge.
Don't push me over the edge, ah.
Okay, that's coming now.
See, this one's been brightened up.
I have to get this tone on here first, and then we're gonna start worrying about the highlights, and building it up so it's more dimensional.
As a variation, you could do this, and paint the pump red.
I just thought that, with the cardinal being red, it was too much red, so I opted for the green pump, but who's to say?
You could put a bluejay sitting on there, and use a red pump, just change the colors a little bit.
All right, that's starting to come together.
It's just more tedious than anything.
I gotta get around this handle.
Gotta get a handle on the situation.
Running out of paint, I gotta mix up a little more.
See how I'm hurrying?
Don't do that.
Take your time.
'Cause I'll probably end up going out of my border here.
I hope not, but I'm under the gun.
All right.
By golly, we're getting there.
Just gotta get it all kinda based in.
Even if I don't get right tight to all the edges, I know I can take care of that when I add my highlight.
All right, that's looking pretty good, or good enough for what I need.
Okay, now, notice how it looks kinda blotchy, and some of the black shows through?
That's the whole point, that's good.
Okay, I'm gonna take this brush and rinse it out.
I'm gonna make a highlight color, which is going to be cadmium yellow pale with titanium white and a little bit of that emerald green.
I wanna kinda brighten on the yellow side of things.
We have the light coming form the right hand side in this painting.
You can tell the way the light's hitting, so I'm gonna come in like this, right down this edge.
See, it's kinda dry brushing and leaves some of the texture of the canvas through it, which is a good thing.
I'm gonna walk this across, and let the brush kinda run out of paint, and it's picking up more of the green that's there, and you'll see it kinda just slowly fades away, and blends away, so it looks rounded.
Then I'm gonna come down here, and I'm just using this one as a guide.
I had a photo of a pump that I had taken here locally.
Like I said before in the last episode, there's a lot of these pumps still around in existence, so, every time I see one, and they're different, some of them are different shapes, different configurations, and obviously, different manufacturers or whatever, but some of them are quite unique, so, every time I see one, I stop and take photos.
I need a little bit on the top of the spout over here.
I'm gonna go this way, I guess, across this way.
This little hook here is to hang the handle of your pail on to fill the pail.
Now, don't let me forget, it's your guys' responsibility, don't let me forget, when I get this done, I gotta put his toes on, right in through there.
I'll forget, so keep me straight.
I'm gonna put a little bit on the handle here, like this.
All right, see, that light color is really what brings this to life, and red and green are complementary colors on a color wheel, and the theory is, they look well when they're used together, so this red and green really jumps.
I'm gonna feather that in a little bit.
Up here, there's a section there where that handle hooks on.
I don't know what to call that, but, see, if I come in and just delineate that a little bit like this.
There's a bolt in there that I can put in there as well.
This one's got a round washer with a bolt in it.
Okay.
All right, now, this one, the only difference is, I went a little bit lighter yet, and I intend to.
I got time for that, so I'm gonna come in, and just kind of soften that transition.
I'm gonna go a little bit lighter.
I'm gonna add more white and more yellow to the mixture I just used, and really jazz it up in a couple of spots.
Notice I'm matting the brush together, a chiseled edge, just like I did before.
And, right here, I wanna give it a little extra zing.
That almost makes you wanna put your sunglasses on, doesn't it?
All right.
Like that, and then a little here.
Feather it away so it looks rounded.
You don't want a line in between there, it's gotta look round.
I'm gonna put a little extra right over here, right where the bird's feet are gonna be 'cause I'm gonna got a little darker with his feet, and they will show up better.
And this pump is looking pretty new, but it really doesn't have to.
What do I mean by that?
I mean we can rough it up.
Now, we gotta put the bird's toes on, don't let me forget, but if I didn't want this pump to look so new, I could actually take some burnt sienna.
I've swished the brush out, and if I just take straight burnt sienna, and I dry brush this on in a couple of spots with the back side of the brush, it makes it look like it's got some rust on it.
Doesn't look so new.
It's got a story to tell.
Roughs it up a little bit, which is kinda nice.
If you get an opportunity to do this painting, I would love to see your version of it.
I have people send me photos all the time.
I love to see what you do with my projects, or your own projects, just something you're painting yourself.
I don't wanna go too crazy with this rusty thing, this rusty technique, but that looks pretty good.
Now, see, once I put it on, I'm gonna go back and kinda pat it, and soften it in so it doesn't look like little, square brush marks that are the shape of this brush.
So I soften it down a little bit.
But the rust gives it a little more character, makes it look a little old and tired like me.
I know, I heard you, somebody in Michigan just said, "Don't forget those toes."
I heard ya, here we go.
So I'm gonna take the number two liner.
This is the skinny brush.
And a bird's foot, they just basically have three little toes that wrap around, with a thumb-y thing on the back, so I'm just gonna put three little toes over the front.
Their toes are kind of a tan-ish color, so I'm gonna take some of his beak color that I had way back when, add a little sienna, make sure you get it thinned down.
Roll the brush to a point, and I'm just gonna put three little toes.
If they're not gonna show well enough, I gotta go a little darker, so I'm gonna add just a speck of sienna and a speck of black, 'cause my yellow there is pretty light.
There we go, so we need to go dark enough to make a contrast so they're gonna show.
And you know what?
I think we got time for one more thing.
I'm going to take a corner of a fan brush, I'll take ultramarine blue, a little bit of red, a little bit of white, and I want something kind of purplish.
I'm going to create the suggestion of some little flowers down here.
I gotta go lighter than that, though.
Maybe I'll put some cerulean blue with it too.
I'm just mixing up kind of a purplish, bluish purple color.
See, I got the brush really exploded, and if I just kinda tap in a few little indications of some flowery things.
What type of flowers are they?
They're flowery things, I don't know what they are.
They're a suggestion and an impression.
Now, see, I'm gonna highlight these a little more so they show up a little better, but see how, just something different than what that one is.
Put some in front of the pump a little bit.
I'm gonna lighten this up.
I'll put some base coat with it, and some titanium white, just to lighten it, and you can use whatever color you choose.
See, if I lighten them up a little bit, it gives me that texture.
You got little something or others in there.
So, that's about it for this lesson.
I'm gonna rip the tape off, and I'll be right back.
Ta-da.
I removed the tape, cleaned up the border, and there's the finished painting.
What do you think?
Came out all right, didn't it?
I know you can do it too.
By the way, what do you call a bird that goes to church?
A cardinal, of course.
Until next time, stay creative and keep painting.
- [Announcer] Support for "Painting with Wilson Bickford" is provided by the J. M. McDonald Foundation, continuing the example modeled by J. M. McDonald by contributing to education, health, humanities, and human services.
Sharing since 1952.
Online at jmmcdonaldfoundation.org.
(soft electronic music) In rural New York State, bordered by the St. Lawrence River and the Adirondack Mountains, is a sprawling landscape with communities that offer self-guided tours for the creatively inclined.
Learn the stories behind the barn quilt traditions, family, agriculture, nature, and beauty.
St. Lawrence County, life undiscovered.
(soft rock music) - [Announcer] All 13 episodes of "Painting with Wilson Bickford" season seven are now available on DVD or Blu-ray in one box set for $35 plus 4.95 shipping and handling, or learn the techniques used to paint "Sunset Lake" with the in depth "Paint Smart, Not Hard" series of Wilson Bickford instructional DVDs.
Includes the bonus episode "Don't Be So Koi."
Additional titles available.
Order online, or watch or download directly to your computer or mobile device.
More information at wpbstv.org/painting.
(soft rock music) (soft piano music)


Support for PBS provided by:
Painting with Wilson Bickford is a local public television program presented by WPBS
Sponsored by: St. Lawrence County &nbps; &nbps; The Daylight Company &nbps; &nbps; J.M. McDonald Foundation