Pacific Coastline
Episode 112 | 26m 46sVideo has Closed Captions
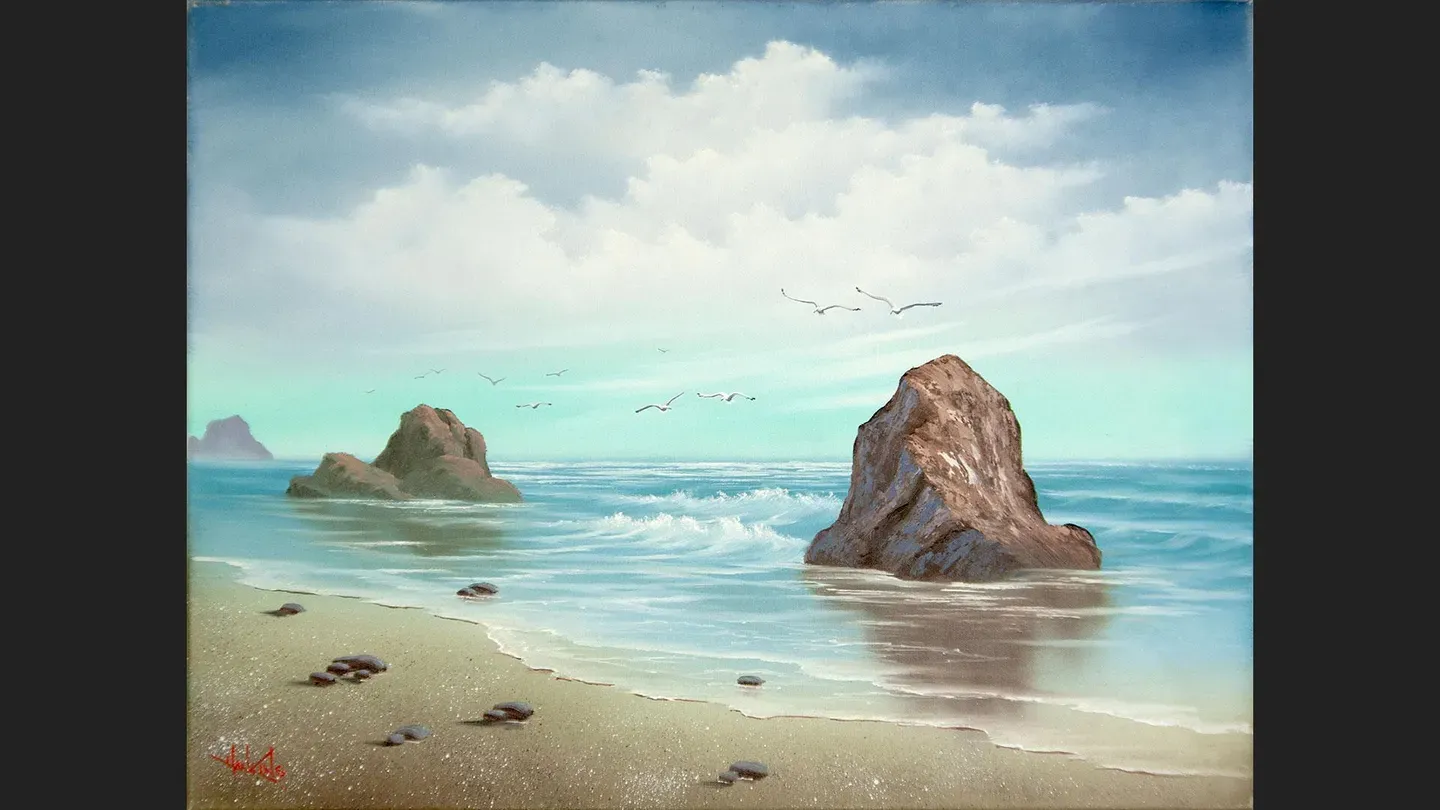
Paint a fantastic seaside scene along with Nicholas Hankins!
Ancient rocks, lapping waves and a serene beach are the perfect setting for a flock of seagulls to hunt for their lunch. Paint this fantastic seaside scene along with Nicholas Hankins!
Problems with Closed Captions? Closed Captioning Feedback
Problems with Closed Captions? Closed Captioning Feedback
The Joy of Painting with Nicholas Hankins: Bob Ross' Unfinished Season is presented by your local public television station.
Distributed nationally by American Public Television
Pacific Coastline
Episode 112 | 26m 46sVideo has Closed Captions
Ancient rocks, lapping waves and a serene beach are the perfect setting for a flock of seagulls to hunt for their lunch. Paint this fantastic seaside scene along with Nicholas Hankins!
Problems with Closed Captions? Closed Captioning Feedback
How to Watch The Joy of Painting with Nicholas Hankins: Bob Ross' Unfinished Season
The Joy of Painting with Nicholas Hankins: Bob Ross' Unfinished Season is available to stream on pbs.org and the free PBS App, available on iPhone, Apple TV, Android TV, Android smartphones, Amazon Fire TV, Amazon Fire Tablet, Roku, Samsung Smart TV, and Vizio.
Providing Support for PBS.org
Learn Moreabout PBS online sponsorship[music] Hi, welcome back, I'm Nicholas Hankins.
Thanks for joining me for another fun little wet on wet painting using the Bob Ross technique.
Come on up to the canvas.
I'll show you what I've got started.
Just have my standard 18 by 24 inch pre-stretched, double-primed canvas.
It's been coated with a thin even coat of liquid white so it's all ready for us to have a little fun.
So let's do it.
I'm going to take a little titanium white on an old two inch brush here and just a little touch of phthalo green, be careful with the phthalo green.
It's strong stuff.
Let's head up here to the center of the canvas.
And I'm just going to spread a little band of sort of mint green, very light right through the center of the painting there and stretch it out.
And of course, it will mix and blend with the liquid white as we work along.
Have a nice little sort of teal green horizon, something a little different, I hope.
We'll see how everything works out.
Next, I'll just take that same dirty brush and pick up a little phthalo blue and alizarin crimson.
Maybe even a little black in there with it.
Phthalo blue, alizarin crimson, just a little black.
Let's head back up to the top of the canvas here.
And we'll darken in the, along the top, along the top and in the corners.
And I'm just going to allow this to work down and again, allow it to mix with the liquid white and get lighter and lighter and lighter as we work our way down.
Just using our little crisscross strokes.
Now, I want to bring this down and allow it to touch into the green.
And we'll come back in a moment and blend it so that we really can't tell where one color stops and the next color starts.
Something about like so.
Alright, let's wash a brush.
And as you probably well know, we wash our brushes in odorless thinner.
Don't want to use soap and water on these.
It can make them fluff out like Bob's hair [chuckles] and I'll shake out the excess and beat the devil out of it.
You know how that works.
All right.
So we'll take a clean, dry brush.
In fact, I might grab one of my extras here just to make sure it's nice dry and we'll head back up to the canvas.
I always want to guard against having a wet brush.
That can cause you headaches and heartaches with this method.
You don't want to get paint thinner back on top of your painting.
It will start to take the paint off.
And that's no fun at all.
No fun at all.
All right.
We'll just set that brush aside, let's pick up, oh, let's pick up a little one inch brush.
They work pretty good.
We'll make some big, fluffy clouds in this sky.
So I'm going to pick up some titanium white, quite a bit.
Maybe, just a little touch of yellow ochre.
Lots of white, a little touch of yellow ochre.
Fill that brush nice and full.
All right, let's come up here and just using the corner of the brush, I'm going to swirl in some fluffy little clouds floating around, having a good time.
We'll have a little, kind of a I don't know, maybe coastal Oregon or California type seascape.
Go back to my big brush here.
Just knock out that excess color.
And I'll use the top corner of the brush just to soften and blend the clouds.
Fluff them up and brush across very gently.
Just two hairs and some air will get that job done.
Let's have another little row of clouds.
Maybe, right through here.
Just leave a little dark between your layers when you want to have several layers of clouds in the sky.
Something about like so.
And again, back to my big brush.
We'll blend it a little.
Knock it down a little.
I don't know if that's a technical art term, but it's one I use a lot.
Just knock it down a little bit.
Let's come back.
Have one more, go for one more layer.
Maybe this, maybe this row just comes clean off the canvas on that side.
Keep plenty of paint in the brush.
And again, just trying to save a few little dark areas.
That way we have enough contrast that we see the row in front.
And I don't mind that the intensity varies a little bit.
Some will be a little brighter, some areas of cloud will be a little brighter, some will be a little softer but that's all right.
I'm going to have a little variety.
Nature has variety.
So we should too.
Fluff them up, brush across.
There we go.
Maybe, how about we switch over to a fan brush for just a second.
Take a little white on the fan brush and sometimes you see these little stringy clouds off near the horizon like this farther away.
Kind of helps, helps set in a little distance early into our painting.
There we go.
All right, let's make a little mixture now.
Kind of the same color.
I'm going to go back for some blue, a little touch of the phthalo green, alizarin.
Just adding that phthalo green to give it a little more of an oceany feel now.
We'll try that out and see what we've got.
A little one inch brush should be fine.
It's got a little white in it, but I don't mind that.
You can adjust your color a little as you go if you want it to have a little more crimson in it, just pick some up and add it to it.
Let's see what we've got.
Now, I want to have a little horizon here and I want it to be at least reasonably straight so I'm going to make a couple of marks there that look like they're fairly copasetic and we'll just pull across here and give ourselves a little horizon line, so we can see the distant ocean, distant ocean water.
Now, if you have any trouble, making straight lines or even straight ish lines, mine are usually just straight ish.
[chuckles] Get them as close as I can.
But if you have any trouble with that, you can sort of cheat and put a little masking tape up there to help you out.
Bob does that pretty frequently in some of the seascapes e paints.
And there's nothing wrong with that.
I do it all the time.
But for this painting I thought, well, we'll wing it, we'll wing it and see how we do.
Now, down here on the bottom, I'm just going to wipe.
I don't want to lose that color.
I want to leave a little in the brush and I'm going to come back for some yellow ochre and a little Van Dyke Brown.
Just add it all together on that same brush.
Actually works to our advantage to have a little bit of that sky color in there.
I'm going to go ahead and paint a little sand in to the bottom.
And I'm just going to let it come up and kind of blend with that ocean color.
A little more that color.
Just using level strokes.
Since our beach is going to be nice level, level ground, level sand I'll just use level strokes like I did in the water.
Then let's back up to our, our big two inch brush and I'm just going to use it to kind of merge those two areas together.
Again, I don't want to be able to tell where one color stops and the next one starts.
There we go.
Wipe it off real good and maybe we'll make a quick pass across our horizon just to, just to sort of soften it down a little bit.
[Nic makes "shoom" sound] Something like that.
All right, Good enough.
[chuckles] Good enough for what we're doing.
All right, let's clean, clean some of that old color off.
I'm going to take a little titanium white and we'll have a little - way, way, way back here at the horizon - we'll have a little sunshine breaking through the clouds, putting a little glistening, glistening light on our distant ocean.
[Nic makes "tchooka, tchooka, tchook, tch, tch, tch" sounds] Something like that.
All I'm doing is touching and picking up, let me show you that.
Pull out a little roll of paint here or a nice flat area of paint and I'll cut across and pick up a little roll of paint like that.
Just a tiny little roll.
And then when we come up to the canvas, all I'm doing is touching, literally, just touching and pulling the knife right back away.
And then I just...
I want to sort of run out of paint.
It gets a little softer.
It feels like that water's glistening far away there.
Back to that two inch brush and now let's graze across.
Whew, just maybe one hair and some air this time.
Or two bristles and a whistle.
Just barely, barely, barely graze that.
All right.
Gets it started.
Got a little something going there.
Let's take some white, a little bit of that, a little bit of that sky cloud color, sort of that lavender color.
Any of that leftover cloud color we had just mix them together.
I'll make a little grayish lavender with that purple, gray and white and we'll find, how about an old filbert brush?
Let's come back here and far, far away here, we'll create a little distant, little distant rock, kind of a rocky coastline.
This will be, this should be fun to paint.
I'm going to fill it in part of the way and then I'll stop short of hitting the horizon.
Then I'll just take a clean fan brush and kind of blend it down, soften it a little bit.
So it feels like there's some mist at the base of that old rock.
Then if you want to have another one, let's come forward.
Come a little farther forward and I'll pick up some brown, some of that lavender color.
And let's come in here a little closer out in the water now.
We'll have, yeah, bigger rock lives right there.
Just fill him in, just fill him in.
A little of that purple gray and some brown.
Got a little foot [Nic makes "rr" sound] sticks out into the water right there.
And then it's out in the water, it'll probably have some reflection.
We'll see its, we'll see its color reflected into that water below and will treat that just like any other reflection, something like that.
Now, let's take, just same dirty brush would be fine, let's pick up a little white, maybe a little touch ochre and bright red, a little touch of dark sienna.
And I'm just mixing these on the brush, so we'll leave it to chance a little bit, see what we come up with and we'll just pick out some little highlights on these rocks.
Just a few little, [Nic makes "rr, rr, rr" sounds] little things like that.
Just some little touches picking up quite a bit of paint and then kind of gently, gently working it in there.
Just have to think about where the flat spots are on the rock and what's facing the sun, what would catch a little light, what parts would be in shadow.
And the beauty of it is unless you're working from a photo, you get to just make that up.
Make it, make it suit your own taste however you want it to look.
Here's a little darker color back on the back side.
Just cut in a little deeper, a little deeper shadow here and there.
And we'll take a little bit of our titanium white and set that rock into the water.
We'll put some little ripples around it.
Maybe even a few more back here.
Again, just touching, just touching.
[Nic makes "tchooka, tchooka, tchook" sounds] Find my, find my cleaner two inch brush here.
I've got a couple of them out, so that'll be handy.
There we go, I've got one, [chuckles] got one little line there that's kind run off crooked.
Let's see if we straighten him up.
There we go, that feels better now.
You have to do that sometimes.
You'll get a crooked line every once in a while, but it's no problem to fix, because as you well know, we don't make mistakes, we just have happy accidents.
Bob wasn't kidding about that.
Let's take a little liquid white and titanium white, just on my little fan brush, and we'll come back here and decide where we have some little waves living.
Might even brush away that backside so it feels like there's a little trough behind the wave.
It worked pretty good so let's have another.
These are, these are just little waves.
They're not huge big breakers.
Just little, little splasher waves rolling into the beach.
This is kind of, this is kind of calm water here.
Maybe there's another one back there, something like that.
Now, if you want to show that they are sort of rolling in and they do have a little bit of, a little bit of splish splash to them, you can take, take your brush and just kind of crunch a little, crunch a little foamy, splashy, frothy stuff up there and then pull it down and in.
Give it a little curl, make it stand up just a touch.
Same on this one, we'll just take our brush and kind of crunch, crunch, crunch, put in a little splashy foam.
A little agitation.
Got to have a little agitation.
Maybe, maybe even out here we'll start to see a little bit of foam and foam patterns and light playing on the water as it starts to roll up on the beach.
There we go.
A little bit more of that over here.
I like that.
Calmer water coming up on the beach.
All right, now we have to get serious.
It is big decision time.
Let's take some black now.
Just eliminate the purple.
We'll take some midnight black and Van Dyke brown, really load your brush up nice and full and we'll have a big rock that lives out about here that comes down and rolls out.
[Nic makes "rr, rr" sounds] Just kind of cuts off that side of the, the waves.
We'll, bring him up and then back over.
Drops down, comes out over and back up.
[chuckles] Just, just let it go any old way it wants to.
Again, you get to make that up.
If you're, if you're working from a photograph, you can follow that or if you just want to make it up and kind of make up your own little rock shape out of your head, that's fine too.
All you have to do is think about where the light's coming from, where your shadow is going to be, and where's your light going to live.
And I'm starting to, just with my brushstrokes now, get a little, get a little idea of where, where does this thing kind of... say I want a little ridge line, just like you'd have on a mountain.
So I'm getting some idea of how that rock is shaped.
And then again, down in the water, using a little black and brown.
This is going to look like a mess for a minute, but we'll turn it into something, I promise.
Let's put a little color down here so we've got some reflection from that rock just down into the water.
Use a big brush, treat it just like any other water reflection that we've painted with this technique.
Brush it down and brush across, make it, make it look shimmery.
And let's take, let's form up that rock a little bit.
I'm going to do that with a palette knife, though.
This one's a little closer, so I want to see a little more texture on it.
Let's take some white.
Clean my palette off here.
I'm making a mess but I'm having fun so I guess it's okay.
Take a little, a little of both browns and some black and some white.
We'll mix it to a very marbled appearance.
Cut off our little roll of paint, as always.
There you go.
That's a good shot of it.
Let's come up here and just, just kind of graze this and let it wander around.
And it comes on down, [Nic makes "zzhoop" sound] and falls over like that.
If you painted a little mountain in this method, you'll, you'll note that this is kind of similar, kind of a similar technique, just allowing the paint to break and create all sorts of little textures and etc.
There we go.
A little highlight there.
Maybe there's a little highlight right out here on this, this little edge.
He's sort of facing the sun.
There we go.
Something like that.
Okay.
Now on the back side, I want to take a little, a little of that lavender and go just a touch darker.
Let's add some more blue and crimson and black.
Mix it up.
And we'll do a little, we'll do a little accenting back here with this lavender color.
Just here and there.
It's maybe a little bright.
Let's knock it down some more.
There we go.
Then we'll change the flavor a little.
I want a variety of colors back here.
When the light gets into a, when we get into a situation where you have reflected light on things it really, it really makes some interesting colors and shapes and textures and contours.
Just want to be able to tell that there is something going on back there, but it's kind of subtle.
Usually your reflected light's a little, a little cooler looking, something like that.
Maybe take a little black, just add some deep, dark crevices in there.
Just kind of here and there.
There we go, something like such.
Now, down around the base.
Let's move all that stuff out of the way.
Down around the base, let's take a little white, and again, I want to, I want to give the appearance of some, some calmer water.
The water tends to calm a little bit as it comes up around those rocks.
It's not nearly as much agitation on it, but you do see a little, a little bit of surface splashy stuff and light playing across there.
Just take our big brush again and just barely graze that.
Barely, barely, barely graze that.
All right.
Now, let's take a little, little touch of that white and purple.
And this is always fun.
Let's come in here and just pushing very firmly, show where the water's coming up on the shore.
Push real firmly.
Wiggle back and forth but I'm still keeping that, still keeping that blade very flat.
I don't want it to dip one way or the other.
I can even come back and shape it a little bit if it didn't turn out just exactly like you wanted it the first time you can come back and sort of push that paint around show it who's boss.
You're the boss.
You got the knife in your hand and the canvas is on your easel.
You're the boss, and you say what happens.
You get to say what goes and what doesn't.
All right, let me find a little fan brush here.
I'm just going to grab the back edge of this and sweep it backward, grab a little and sweep it backward.
And it kind of hooks all of our beach and our ocean together right there.
Little bit from that.
There we go.
You can even, you can even sort of piddle with your rock a little bit if you want to.
If it feels like anything's too strong, you can knock it down a little bit.
Felt like some of those darks were a little strong so just kind of piddle them a little bit.
I usually don't recommend a lot piddling though, it's not a good idea in general.
[chuckles] Sometimes it is.
Just have to be careful.
All right, let's take a little, a little bit of that shadowy color I was using, the lavender that was on the back side of the rock.
I added some black and brown.
And tell you what, while I'm, while I'm mixing, let's take a little, little light color here beside, I'm going to add a little liquid white to that.
Got some, got some crazy stuff here to show you.
This will be fun.
Let's take our, our big fan brush.
I'm going to dip it into the paint thinner and sort of liquefy, liquefy this grayish purple color, maybe even just a little more here.
I'll set my palette down for just a moment, grab my knife, come up here to the beach and watch this.
We're going to take and flick a little, [Nic makes "tch, tch, tch" sounds] a little texture in our sand.
Isn't that fun?
Start, start kind of in a corner until you see what it's doing though.
There we go.
Let's wash and I'll get a little bit of the same thing again, just with the light color, a little bit of that, a little bit of that lighter color on the fan brush.
Set the palette down, flick a little light color in there, too.
That's always kind of pretty.
Fun thing to do.
All right.
Let's come down, just to add a little more, little more water motion, watery movements down here in the foreground.
A little brighter splish splash out here.
Maybe, maybe we've even got, take a little Van Dyke brown, black on our knife And I've got that light color here.
Pull one side through that.
Maybe got we've got some little rocks that live out here on the beach, little baby rocks.
They'll grow up, be big rocks like those.
Or maybe not.
Maybe I'm just making that up, but that's okay.
It's kind of a Bob flavor joke, isn't it?
[chuckles] Pull a little shadow out from behind our rocks.
Just here and there.
There's a little reflection under that one.
Who knows?
And clearing a big space on my palette now.
I want to show you one more thing.
Usually in an ocean scene like this, it's not uncommon to see some seagulls.
So let's take a little black and I've got a little left over lavender.
That's fine.
So I'll make a little bit of that color and off to the side here I'll take a little white.
And again, I'm going to mix a little liquid white in there with it, so it's a little softer.
All right, let's grab a liner brush and I'll first go into that purple color and really, really wet it down with paint thinner, make it very runny.
Very soft.
Let's come back here in the, in the distance and we'll see, we'll see some little seagulls flying around, just make some little, little M birds flying around back there.
And as they get closer, it's sort of fun to take that, that original gray and pull one side of your liner through some light, and then you can show some birds that are a little closer and you actually see the highlight and the shadow.
You can kind of do that all in one stroke.
A little bit of that gray, some of my light color.
There we go.
Just have them fly around.
Looking for lunch.
Be a good place to look for lunch.
I hope you enjoyed this painting.
Hope you paint it, try it out, Hash tag it, paint like Bob so I can see what you did.
Thanks for watching and we'll see you again soon.
Happy painting.
[Music] [announcer] To order Nicholas Hankins' book of 13 never before seen painting projects from Bob Ross, call one 800 Bob Ross or visit BobRoss.com [music] [music]


Support for PBS provided by:
The Joy of Painting with Nicholas Hankins: Bob Ross' Unfinished Season is presented by your local public television station.
Distributed nationally by American Public Television