
E8 | Toy Truck; Pot Filler Faucet | Ask This Old House
Season 25 Episode 8 | 23m 42sVideo has Closed Captions
Tom builds a wooden toy truck; Richard installs a pot filler faucet.
As part of the show's 25th season celebration, Tom Silva reunites with a Chicago homeowner from season 15 to build a wooden toy truck as a holiday gift, a decade after he helped set up her garage workshop. Richard Trethewey helps a homeowner prepare to host Thanksgiving by installing a pot filler faucet next to her stove. Then, the team revisits some of their favorite AskTOH holiday moments.
Problems playing video? | Closed Captioning Feedback
Problems playing video? | Closed Captioning Feedback
Funding for Ask This Old House is provided by The Home Depot and Renewal By Andersen.
Support provided by:


E8 | Toy Truck; Pot Filler Faucet | Ask This Old House
Season 25 Episode 8 | 23m 42sVideo has Closed Captions
As part of the show's 25th season celebration, Tom Silva reunites with a Chicago homeowner from season 15 to build a wooden toy truck as a holiday gift, a decade after he helped set up her garage workshop. Richard Trethewey helps a homeowner prepare to host Thanksgiving by installing a pot filler faucet next to her stove. Then, the team revisits some of their favorite AskTOH holiday moments.
Problems playing video? | Closed Captioning Feedback
Where to Watch Ask This Old House
Ask This Old House is available to stream on pbs.org and the PBS app.
Keep Exploring


This Old House Insider Newsletter
Get This Old House exclusive stories, tips, and behind-the-scenes information delivered right to your inbox every month.Providing Support for PBS.org
Learn Moreabout PBS online sponsorshipKevin: Our experts travel across the country to answer questions about your house.
Today it's the holiday season at the barn.
First, Tommy invites a homeowner who he helped in Chicago to share a special toy using the tools Tommy set up for her over a decade ago.
Tom: And I love the fact that it's handmade.
Kevin: And do you wish there was an easier way to fill your pots for all the holiday gatherings?
Richard helps a homeowner install a pot filler at their stove.
All that's coming up next on "Ask This Old House."
♪ Tom: As part of our 25th season celebration, we are revisiting some of our favorite projects.
And one of my favorite projects was setting up a garage woodworking shop for a homeowner in Chicago.
So what I did is I made a bench that will mount to the wall.
So when you swing this up, the leg will swing in and it will hold the bench out of the way.
Stefani: Nice.
Tom: I think if we take the pegboard and hang it horizontally, you'll be able to hang a lot more things on it.
Stefani: All right, pegboard is done.
Tom: We can lay some interlocking foam pads on the floor to make it easier to work on.
I brought a few more things that I think you would really need in a nice-sized shop like this.
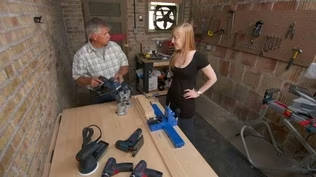
It's been 10 years since we set up that woodshop, and today I've invited Stefani to the barn so we can work on a project together for the holidays.
Stefani: Hi, Tom.
How are you?
Tom: Good to see you again.
Stefani: Yeah, good to see you.
Thanks for having me.
Tom: How's that workshop holding up for you?
Stefani: It's working out really well.
Uh, big changes since you all came 10 years ago.
-Tom: Yeah.
-Stefani: Got married.
I had two kids.
Tom: That's a big change.
Stefani: And bought a bigger house, which meant leaving the garage that we had you all in.
But I brought all the shop with me to a bigger garage.
Tom: Oh, that's good.
Stefani: I have a two-car garage.
Yeah.
And I have a couple of pictures that I'd love to show you of the shop.
Tom: All right.
Stefani: A little bit bigger, for sure.
Tom: Is that the bench that we made that folds up against the wall?
Stefani: So that is an 8-foot stationary bench that I built against the wall.
But this one here, if you remember the Murphy bench that you built.
Tom: Right.
Stefani: I put more legs on it and a shelf on the bottom and stuck it on some casters.
Tom: So now it doesn't fold up anymore.
Stefani: It doesn't fold up anymore, but it does roll away in the corner when I park the car.
Tom: That's great.
So how was your experience on the show?
Stefani: The experience on the show was amazing.
I had a lot of challenges trying to figure out how to build a shop in that garage.
Tom: That was a tiny space, I got to say.
Stefani: It was a tiny space.
We have a lot of collaborative work places in Chicago and those are great, but with the kids, I can't always leave the house.
And so being able to have something in the backyard when they're sleeping and going out there to work, but also so I grew up in a woodshop with my father.
And so now it's been really nice to have the kids kind of work in the woodshop with me.
Tom: So you get them hands on.
Stefani: I do have them hands on.
They have little tools that they work on.
My oldest freestyles with all my scraps, which is really cute, and just being able to have them and show them something that I'm passionate about and have it so easily accessible, has really meant a lot.
-Tom: At a young age.
Nice.
It gets the mind and the hands, coordination working well, so that's great.
Stefani: My oldest made a wooden sword for his Halloween costume last year.
Tom: Oh, nice.
Stefani: And so he did it all by himself.
He's got some hand tools that he is getting pretty good at it.
Tom: That's great.
Hand tools are important.
So this is what you've been making.
Stefani: So, yes, when I had the two kids, I wanted to start building stuff specifically for them.
Two boys, kids are sticky, a little grimy, and so I wanted something a little bit smoother, but also something like this one that can get chucked down the stairs and still survive.
Tom: It's real nice hardwood.
You've got a beautiful finish on it.
So no splinters.
-Stefani: Mm-hmm.
Tom: And you're using what, three different species?
Stefani: I am, so I use a maple for most of the pieces.
It's a hardwood.
It's got a closed grain.
Not likely to splinter very easily.
And then I have some sort of accent statement pieces.
This one is zebrawood.
I've also used walnut before.
And then the door is cherry, which ages pretty nicely over time, to make the truck and they really love it.
To thank you for the shop that you built me 10 years ago, I thought maybe I could teach you how to make one of these trucks.
I heard you had a grandson.
Tom: I do.
He's a little under a year and a half.
Stefani: And I thought maybe you could give him one for Christmas if you'd like.
Tom: That would be nice.
Stefani: Great.
So I brought some maple.
I've got some cherry, I've got some walnut.
And I thought we could get started by working on the chassis first.
Tom: Sounds like a good plan to me.
Stefani: We're going to cut the length for both this piece here, but also a little bit at the end that will be attached to the dump box.
I'm going to do 6 3/4 inch to get started.
We got some walnut here because who doesn't love a good statement wood?
To focus on the cab.
-Tom: Okay.
Stefani: We're going to cut a little piece off, but we also want a 45-degree angle here.
So rather than sand that all the way down, we'll use the miter saw to cut that.
Tom: Save some time, I love it.
Stefani: We can reset the miter saw to straight.
We'll cut a 2 1/2-inch length off of this.
Tom: So 2" by 2" by 2 1/2".
-Stefani: Yep.
-Tom: Cool.
We'll have to do some sanding a little bit first, but that will eventually go right there.
Tom: Oh, yeah, I see it.
Stefani: And so now we can go over to the drill press and put in some headlights.
And I'll drill in maybe 1/4 inch, not too far.
We've got a little piece of dowel.
We'll dab with glue, pop it in there, lightly tap with a hammer to make sure it's snug, and we'll let that dry.
And we'll glue it to the chassis as well.
Tom: Place it on, keep it even, and it should stick.
A little sweets.
There we go.
So on this truck we've got the chassis and the cab, but we also need some axle blocks to hold the wheels.
I thought about putting them in the chassis themselves, but if you put them up here, then the wheels are going to get in the way of any overhang.
And so what I like to do is drop the wheels just a little bit.
And for that we'll need the axle blocks.
Tom: Okay.
Stefani: We can use this wood here.
We're going to need about 2 inches wide.
Tom: Okay.
All right, so now you want to do two holes down the center of each block.
To hold them parallel with the drill bit, I'm going to use the truck body and cab, push the pieces in the corner, that's a 90-degree corner, and clamp the blocks to that.
And now we're holding them up so when we drill, the hole will be nice and parallel with the drill bit.
Stefani: Next we're going to focus a little bit more on the dump box.
Tom: Okay.
Stefani: This is a 1/4-inch thick maple.
And we're going to make the walls and floor and front.
This is about 3 inches wide by 2 1/2" and 4 inches.
But then the sides are going to be a little bit less wide by 1/4 inch.
Tom: I see, because they're sitting on top of the bottom.
Stefani: Yeah, exactly.
We're going to want about 4 inches long for each of the pieces.
So now these all come together and we'll glue them up to make the dump body.
First thing we'll need to do is we want to lightly sand at least one side of these.
Because we'll be gluing this up into a box, we won't necessarily have a lot of room to sand the inside, so we'll get a light sanding on the inside faces and then we can glue it all up.
All right, so we've got the cherry door lined up inside the box.
We've taped it in place.
We have some lines here showing us where to drill all the way through.
And once we go all the way through from end to end, we can stick our dowel through and it'll swing open and closed.
Tom: Sounds good.
Stefani: Now, before we glue it in place, we want to take a minute so we can sand this edge as well as give -- give the whole kind of outer body some sanding so that everything is smooth and rounded at the edges.
Tom: Okay.
Stefani: Okay, so we've got all of our pieces cut, glued, and sanded, dump body, the door, and the axle and then the chassis, cab, and axle blocks.
Tom: Okay.
Stefani: Some of the last things that we need to do is we have a piece that we glue to the underside of the dump body, and that lets us affix a hinge to it.
All right, let's take a look.
-Tom: Perfect.
-Stefani: Not bad.
So we have all our pieces here.
We've got our door with the axle.
We've got some store-bought wheels.
You can make them yourself with a hole saw.
But I purchased them.
Tom: Definitely saves some time.
Stefani: It definitely saves some time and some headache sanding all across the perimeter.
So we're going to use those as well as some axles here.
So before we actually put everything together, we're going to take a little bit of a time to finish some of the pieces just because once we put it together all the way, we won't get to reach everywhere.
And we just want to make sure those are finished.
I prefer to use a food-safe finish.
I am making it for kids and so just like to be safe.
I usually do about five coats just to be really safe and ensure that everything's kind of shaping up.
Well, today we're just going to do the one coat.
All right, next up, we glue the wheels onto the axles.
All right, so I'll stick this through one of the axle blocks.
And then we can glue the other side in.
We want to make sure we want to leave a little bit of space between the wheel and the axle block so that it can rotate easily.
Tom: Bring it right out like that.
That should give you the space.
Make it flush.
Wipe it off.
Wheels are on.
Stefani: All right, wheels are on.
The last thing we want to do is finish the dump body and then glue on the axle for the door.
Tom: Slide that in.
Let's put the pin in.
Before we push It in all the way, we'll put a little dab of glue on the end.
Just get that on there.
Let it run around a little bit.
Stefani: There you go, one finished dump truck and one present off your list.
Tom: You know what?
That's the cutest little thing.
I absolutely love it.
And I love the fact that it's handmade.
What a great idea.
-Stefani: Thanks.
And thank you so much for coming out 10 years ago and starting my shop.
It's been so much fun getting to do a lot of woodworking.
It's really nice being able to make stuff like this for my kids, as well as introduce them to woodworking when they're young.
Tom: It's a good hobby and it's a good trade.
Stefani: Excellent.
Well, happy holidays, Tom.
Tom: Thank you and same to you.
♪ ♪ Richard: You must be Faith.
How are you?
Faith: Richard, great to see you.
Richard: Nice to see you.
Beautiful little neighborhood and a split-level house.
Pretty great.
-Faith: Thank you.
-Richard: Good.
You wrote us about a pot filler?
-Faith: Yes.
Richard: Are you a big cook?
Faith: Uh, still learning.
Richard: Okay, let's see if we can help you.
Faith: Great.
Come on in.
Richard: Look at this place, I love it.
-Faith: Thank you.
-Richard: You been here a while?
Faith: Four years.
Richard: The kitchen's new, right?
Faith: Kitchen's new.
-Richard: Did you do it?
-Faith: I did not do it.
It came finished this way.
Richard: Right.
But you wanted a pot filler?
Faith: I do, so it's my first time I'm hosting Thanksgiving since I moved here.
My mom is coming.
She cooks a lot of Filipino food.
-Richard: Okay.
-Faith: So it would be great.
Richard: We got to make mom happy, don't we?
-Faith: Yeah, we do.
-Richard: All right.
So normally they mount into the back wall right here.
But this is all tile, so we got to figure out how to get a water supply to it.
So there's water here.
But you got kitchen cabinets there.
So we'd love to find a way to feed it maybe from the back.
So it's a split level.
So what's up here?
Okay.
A bathroom.
Of course this is beautifully finished and tiled.
I'm not going to do anything there.
This place is too finished.
And then let's look here if there's a way to maybe feed it from this way down here.
-Faith: Downstairs bathroom.
-Richard: Yeah.
But we'd have to open up this wall right here.
There's no guarantees we even have a water line.
Let's keep looking.
Faith: Well, I also have the basement.
Richard: All right.
Good.
Let's check that.
One more level.
All right, we are right underneath that kitchen right -- Oh, look at you.
This is not finished.
All we need for hot and cold water.
We only need cold for the pot filler.
-Faith: Oh, good.
-Richard: That means there's a way that we can cut into this line, send a water line up.
But there's one more thing to check.
We're gaining on it.
-Faith: Sounds good.
Richard: Okay, let's see what we got here.
So we should be able to feed into this corner.
There's a lazy Susan.
Plenty of space right here.
That's great.
So we can get the water up.
But I really don't think you're going to be able to have a pot filler in that back wall, okay?
It's not worth ripping that apart.
But what I want to propose to you is a surface-mounted pot filler.
We'll drill a hole right here, mount it.
That swivel will come out here to be able to fill the pots, and then it tucks back in, all right?
Faith: Wow, that's actually better.
-Richard: You like that better?
-Faith: That's more my style.
Richard: I like that.
Good.
All right, I'm going for a little shopping spree.
Faith: Sounds good.
Richard: All righty.
Every day is Christmas here at "Ask This House."
-Faith: Or Thanksgiving.
-Richard: Whatever the holiday.
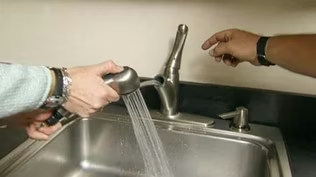
Here is your brand-new pot filler.
Okay.
Satin finish.
It'll extend out like this.
It has a shut-off valve here.
And also one right here.
Isn't that cool?
-Faith: So sleek.
-Richard: Swivels.
And that is going to fit underneath perfectly right here.
Can pretty much cover at least four of the burners right here.
And then it tucks back in, has a shank at the bottom that'll help to mount the faucet, but also allows me to connect a flexible connection underneath it down in the lazy Susan area.
It also invites a shut-off valve for service if you have a need to turn it off quickly, which is great.
Then we're going to transition to copper, and I'll run copper with the press connections in all the remaining part down into that basement, okay?
It starts with us drilling this hole in your beautiful countertop.
Probably the hardest part of the job.
So I've got some tape down here.
I've marked where I want that hole to be.
Now we've got to talk about how to drill into marble or stone.
A couple different choices.
Both of these are diamond hole saws.
You can see right here there's no center point at all.
And so now if you're going to drill this, you've got to be really careful as you get started.
You want to try to get that first revolution around.
So what I want to use is this actually, it's a very interesting arbor with the same size hole star.
And you see it's got a really sharp point and that'll help you get that first thing started.
But watch what happens.
When you drill it down, it's a retractable arbor.
Okay?
So now we can make hopefully a perfect hole.
I'm also going to use some water to control dust and to actually make the diamond blade last a little bit longer.
The water fell out.
When the water goes down, it means we've broken through.
So now we have the stone slug is right here, but it's stuck on the top of this lazy Susan cabinet.
So I'm just going to drill from the bottom to release the slug.
Okay, take the slug.
-Faith: I got it.
-Richard: Thank you.
All right, Faith, now we got to mount the faucet.
I really want a good watertight seal between the faucet and the marble.
So you can see there's a factory gasket right here that's really designed for it.
I've always used putty, but I'm not sure we even need putty in this case.
If we did use putty, I want to call this out.
Always use a stain-free putty.
Regular putty can actually soil and mar a perfectly good marble countertop.
But we're not going to worry about that because we're not using it.
Now, I do need your help right now to hold this in place for me.
It doesn't matter where you have it.
I just need it straight for now.
And I'll put on this gasket and nut.
So let me snug that up by hand.
All right.
So just hold back.
Now I can tighten up that nut using an adjustable open end.
Only because I opened up the ceiling of the lazy Susan enough.
But if I didn't do that, they make this amazing wrench called a basin wrench.
So it'll allow me to tighten up a nut even in impossible places.
I'm going to just snug that up.
Now give me the flex supply line.
-Faith: Here you go.
-Richard: Thank you.
All right, so I'm just going to set this on temporarily right now.
And that helps me show where we're going to drill down through where the feeler bit.
Why don't you pass me that bit and drill, please.
Faith: Here you go.
Richard: All right.
I'm going to drill this hole.
Why don't you go down the basement?
It's right over the washing machine.
And just give me a holler when you see it poke through.
-Faith: Sounds good.
-Richard: All righty.
Faith: I see it.
Richard: Yay!
With the pilot hole all the way through, I can use a self-feeding auger bit to create a perfect hole for the copper pipe.
All right, I've already drilled from above.
Now I'm going to do a similar hole up through that pilot hole we have to just finish it, and then I'll have a perfect chase for our new pipe.
Faith?
-Faith: Yes.
Richard: Could you push that piece of copper pipe up to me, please?
Faith: You got it.
Here it comes.
All right, we did it.
Richard: Just hold that pipe exactly where it is right there, please.
-Faith: Okay.
Got it.
Richard: Okay.
Okay, so I've made a little press connection up above there, so we're done upstairs.
So now we're just going to run our copper piping down here in the basement.
I really want to give it its own shut off.
So I've turned off the water main and I'm going to cut it in right here.
Faith: I had no idea that's how you cut pipe.
Wow.
Richard: Well, this is actually a little -- little handy little cutter I love.
Gets into all kinds of places.
Okay.
There's that.
Now, what's really cool is I cleaned this already.
No flux, no solder I'll have to add.
And then this comes on here.
Faith: Look at that.
Richard: With soldering, if I have any water, it will not allow me to solder at all.
This is this, this is this.
All right.
Okay.
This one.
Faith: So, Richard, I got to ask, what is this tool?
Richard: It's a hydraulic crimping tool that just puts so much pressure, it binds that fitting together.
♪ ♪ -Faith: So satisfying.
-Richard: It is, right.
♪ Faith: Wow.
Richard: All right, we have one rule.
Homeowner always gets to do the honors.
Faith: All right, here we go.
Richard: Should we call your mother in for that?
Faith: I would love to bring her in.
Here we go.
Let's see here.
Oh, look at that.
Richard: It's cold water?
Good.
We got the right pipe.
That's good.
-Faith: Oh, my goodness.
Richard: All right, well, you enjoy it.
Have the greatest holiday.
Getting all your family back home is going to be great.
Faith: It's my first time hosting Thanksgiving.
Thank you.
-Richard: Send me pictures.
-Faith: Will do.
-Richard: All right.
Faith: Oh, look at that.
So nice.
Kevin: Tis the season, and here at "Ask This Old House," we've got our own ways of making merry during the most wonderful time of the year.
[ Cheering ] Tom: Thank you, Richard.
That's a nice one.
Kevin: Oh, everybody's in the mood, huh?
I feel a little underdressed here.
Hang on.
Let me -- How about this?
All right.
Are you guys excited about the holidays as I am?
Jenn: I love it.
So good.
Nathan: The guys sent me on the mission, and they said come back with the most spectacular tree you can find.
Tom: Let's do it.
Richard: There are only two people you don't want to be around the holidays.
One is the turkey and the other is the plumber on the day after Thanksgiving or the holidays.
Kevin: A tough day for you guys.
Richard: Yeah, a lot of food goes down.
It's the most used day of the year for a kitchen.
Kevin: There is an urgency to the questions we get around the holidays.
Richard: Holidays, it seems like the heating system fails or the garbage disposal clogs.
So we're always on call.
Woman: We have two little ones, a 3- and a 1-year-old, and we just really want to make this Christmas really magical for them.
Heath: I mean, how many times growing up did you have issues with lights blowing?
Having issues and just being able to kind of help solve that and let people do it safely.
Woman: Heath, I love it.
Tom: Merry Christmas, right?
Kevin: You are getting in the spirit.
Tom: Christmas spirit there, sonny boy.
You got to have it.
Richard: This is like finger painting.
You were really good at finger painting.
-Woman: Aw.
-Ross: Aw.
Kevin: Anyone on the naughty list this year?
Man: There's a few.
Tom: I made this toy box basically for you.
Kevin: You just told me it was for your grandson, and I helped you make it.
Tom: Yeah, yeah.
All: Happy holidays, everybody.
[ Laughter ] HOST: Next time on Ask This Old House, we're talking about something homeowners ask us about every winter, ice dams.
First, Tommy demonstrates how they form, the damage they cause, and how to mitigate an ice dam in a pinch.
TOMMY: Blow it right in there fast, and you'll watch the water stop right away.
HOST: Then Heath and Ross help a homeowner determine if roof heat cables are a good solution to prevent ice dams on his house.
All that on Ask This Old House.














Support for PBS provided by:
Funding for Ask This Old House is provided by The Home Depot and Renewal By Andersen.